Adaptive Graphics Quality
Description
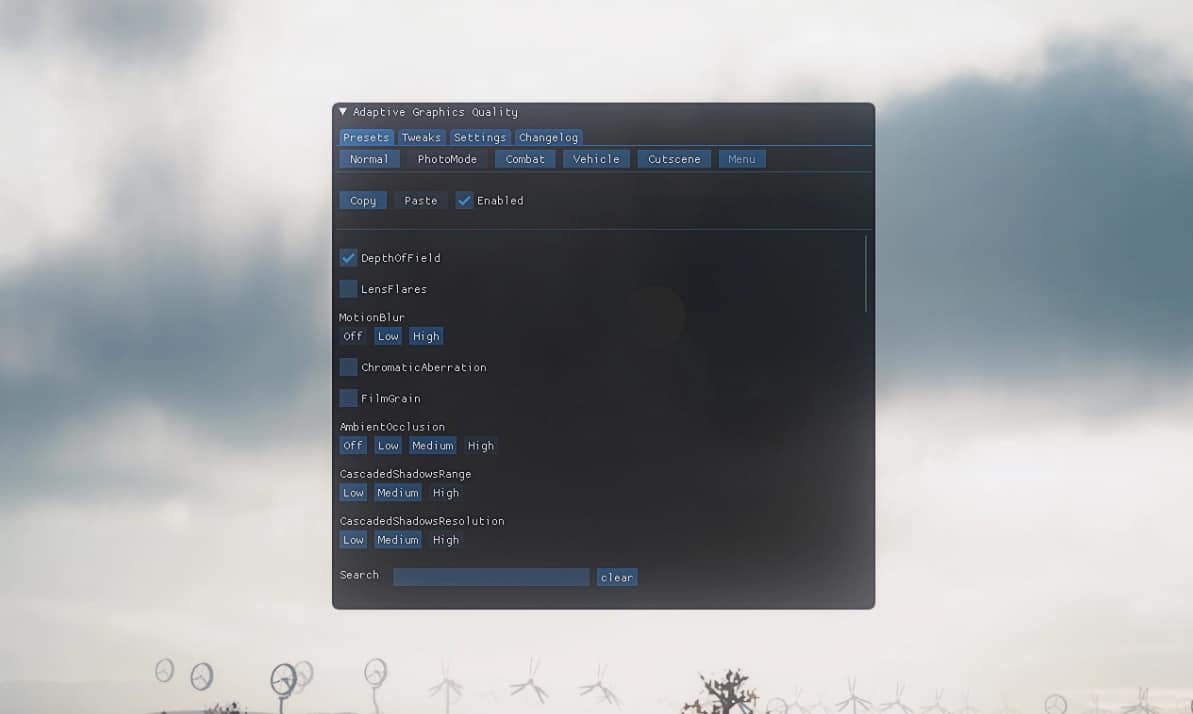
Automatically switch graphics quality depending on the game context.
Have a “Default” preset with ultra settings for when you’re casually exploring the Night City, a “Combat” preset for when you need your FPS the most, and the “Photo Mode” preset for when you want the game to look as good as possible.
In total, there are 6 presets: Default, Combat, PhotoMode, Vehicle, Cutscene, and Menu.
It is also useful to set up NVIDIA DSR/AMD VSR feature that will allow you to run the game at a higher resolution than your monitor supports. This way, you can auto switch to 4K when the Photo Mode is opened.
There is also a “Tweak” tab that allows you to modify some of the internal graphics settings (e.g. Bloom)
Reshade users
Some of the graphics settings (DLSS, Resolution, StaticResolutionScaling, Window Mode) cause Reshade to be reloaded.
This results in a slight stutter, which could be quite annoying with the “Cutscene” preset enabled.
To avoid this, don’t change settings that are colored yellow.
You can also force Reshade to only compile shaders that are enabled. This will speed up the reload. (“Reshade Menu” -> “Settings” -> “Load only enabled effects”).
Installation
1. Make sure you have Cyber Engine Tweaks installed.
2. Drop the content of an archive into your cyberpunk directory (where the “bin” folder is).


Do The presets changes automatically, for example, based on fps or do We need to change it manually?